It’s no secret that, as small business owners, we have A LOT to keep track of. We often get asked how we organize all of our tasks and keep everything straight, so we thought we’d introduce you to one of our favorite tools: our virtual to-do list, Trello.
Trello is our go-to hub for task management and organization. For us, it’s so much more effective than paper to-do lists and other systems we’ve tried in the past –– and the best part is that it’s completely free! * Three cheers for helpful tools that are free!
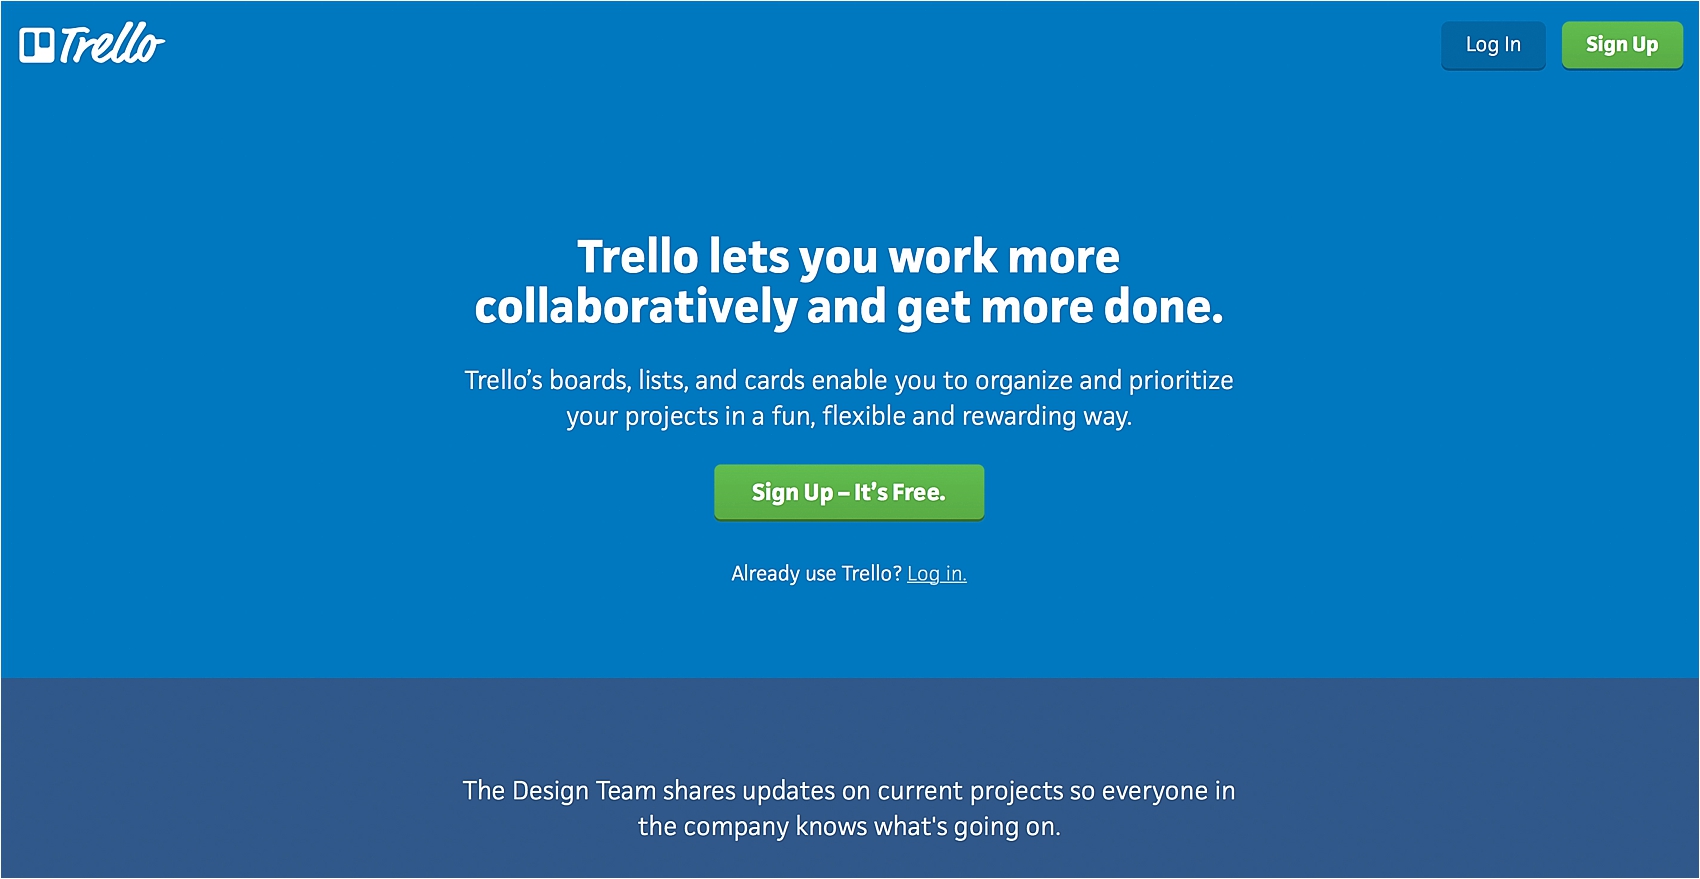
We thought the most helpful way to explain how we use it (and why we love it) was to walk you through setting it up step by step so you can see how it works. So here’s how to use Trello for your business:
Step 1: Create a Free Trello Account
Step 2: Create a “Board” for You (and Each Person on Your Team)
We each have our own board, one for Amy’s tasks and another for Jordan’s. (If you work alone, you’ll only need one board!) If you work with another person or a team, create a board for each person. That way, you keep things clean and organized and allow each person on the team to focus solely on his or her tasks. The nice part about this feature is you can easily share and send task cards from one person to another with the click of a button! Note: Your team doesn’t have to be someone who works for you full time. It could be a virtual assistant, part-time editor, album designer or even a nanny who helps with your kids a few times per week. We use Trello for business AND personal tasks!
p.s. The images we selected for our boards should reeeaaaalllyyy tell you something about our personalities.

Step 3: Create “Lists” (Think of These as Categories)
Now that you’ve created a board, you’ll be prompted to “Add a List.” We think of our “lists” as categories, to help keep all our tasks straight. We organize our categories from left to right, with the categories on the left being the most urgent.
You know your business best, so you might want to create your own system, but if you don’t know where to start…
Here are our suggestions for categories:
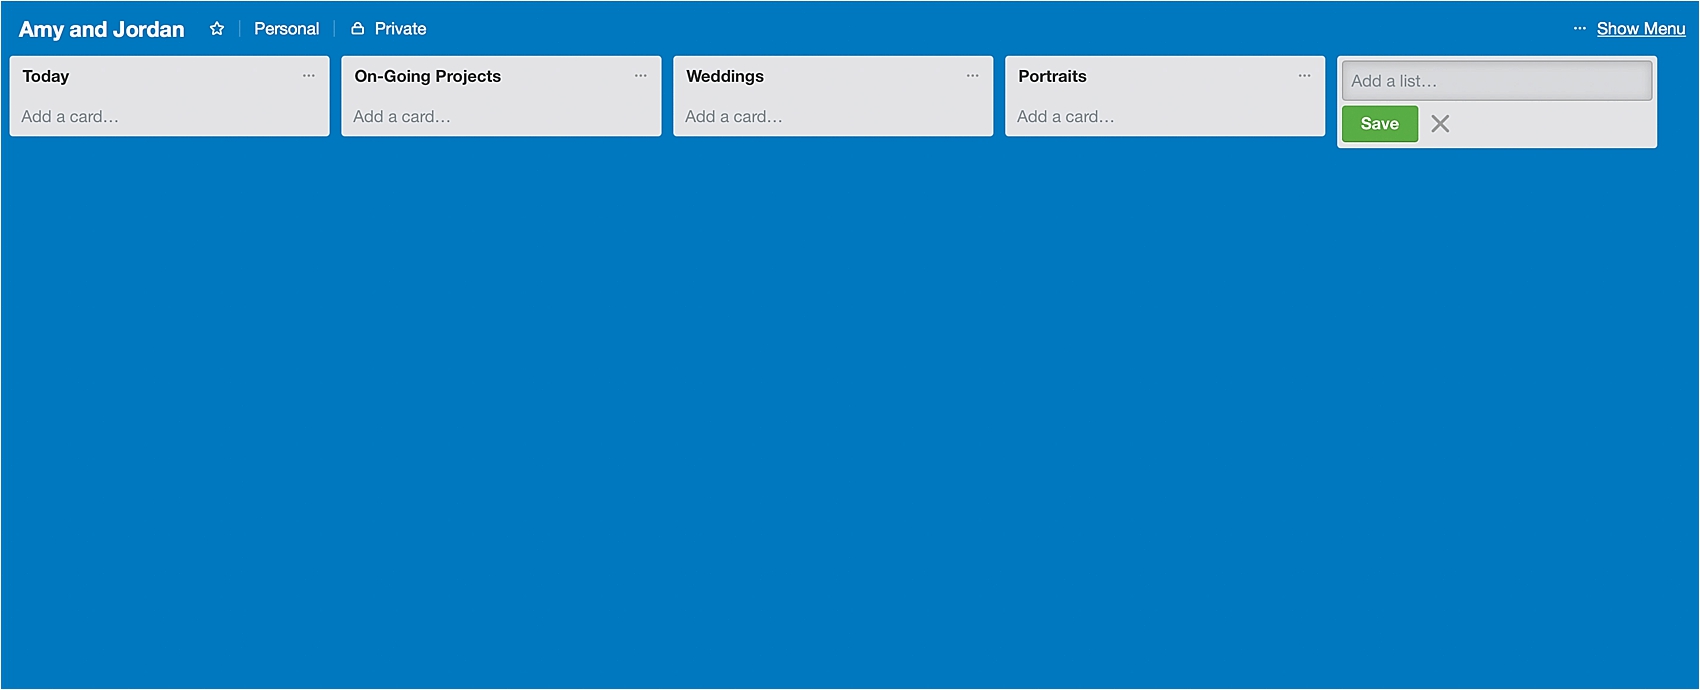
– Today
This is the daily to-do list, with tasks lined up in the order we plan on completing them throughout our work day.
– On-Going Projects
These are other tasks, ideas and projects that are important, but that we’re not planning on finishing by the end of the work day.
– Weddings
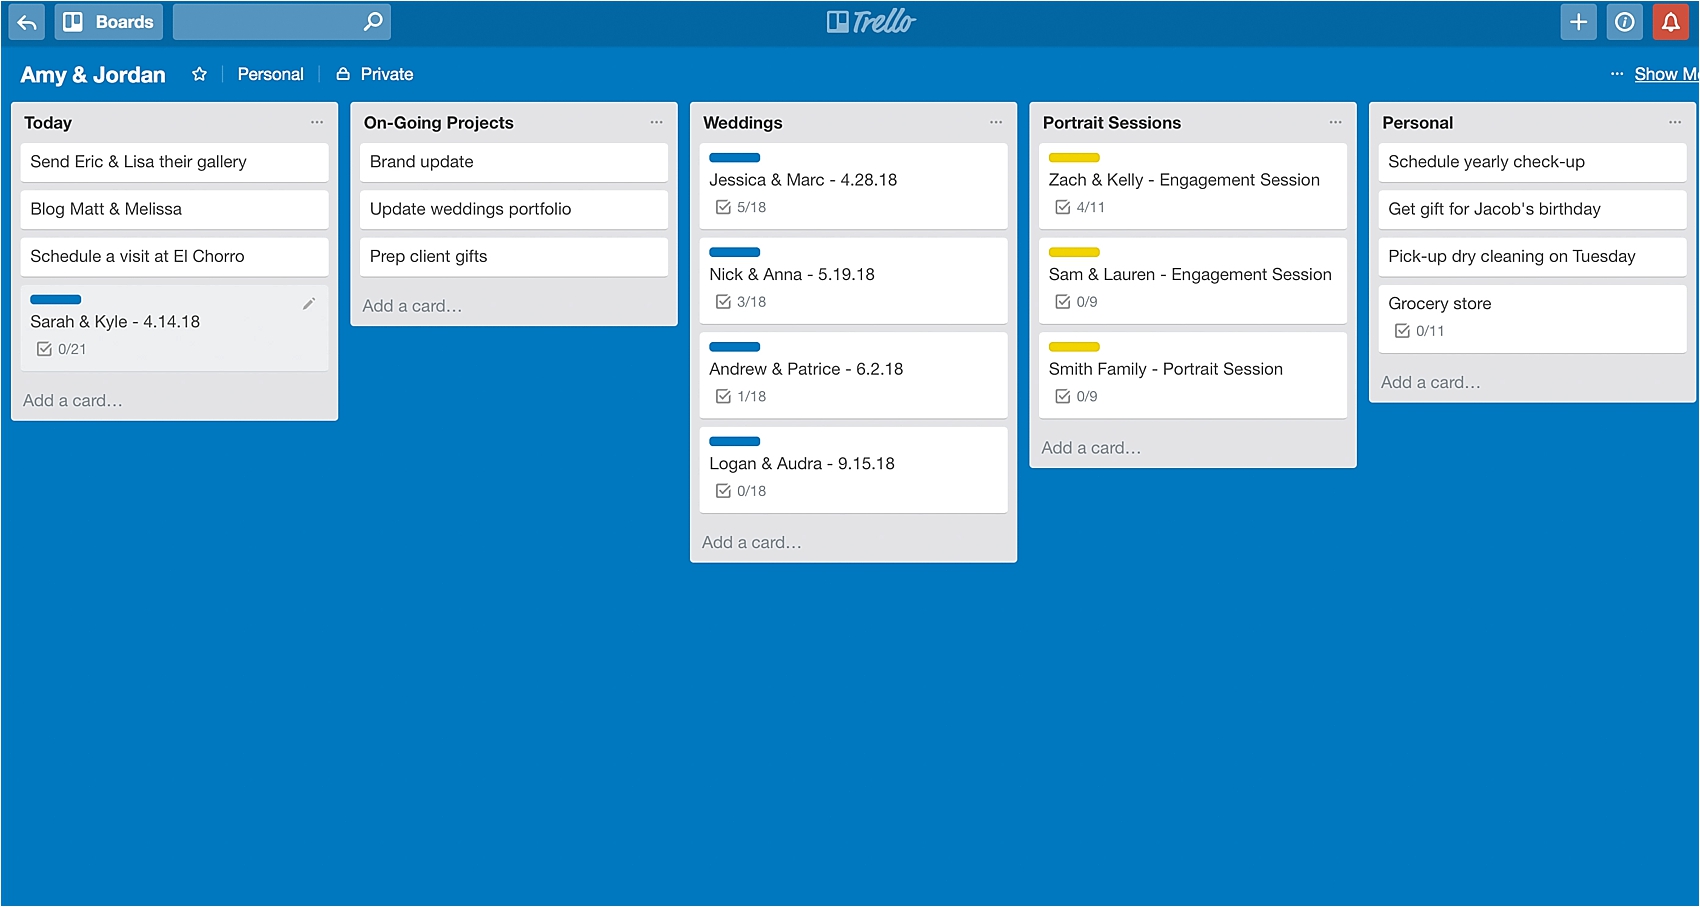
This is how we organize our wedding workflow. The checklist for each client is exactly the same on each card, but having them all in one category allows us to easily see where each client is in the process. We can quickly see whether we’ve mailed out their Style Guide, for example, and we can also drag their card into the “Today” column when it’s time to work on their images.
– Portraits
Even though this workflow is much simpler than our wedding workflow, we like having a separate category for portraits for the same reasons as above.
– Personal
We use Trello primarily for business, but we’ve found it’s really helpful in organizing our personal life, too! Whenever we think of something we have to do for our personal life, we pop it into Trello to help preserve our brain space and make sure we don’t forget. We use it for groceries lists, quick reminders and so much more!
Again, these are just category suggestions! You can completely customize your list categories in a way that makes the most sense to you.
Step 4: Create Cards
Once you have your categories created, you’re ready to start adding cards! Just think of “cards” as tasks. If you were making a bulleted to-do list on a piece of paper, every new task you add would be on a separate line. It’s the same thing with cards. Every task or “to-do” item that pops into our head gets its own “card.”
The thing we LOVE about “cards” is that once you create a task card, you can drag and drop it into the order it needs to go so you can organize your day. It really helps seeing all of our tasks before we order them (we like to put the most important and urgent task on top and work our way down) and we can even drag cards between categories. So if you had a wedding sitting on your “Wedding” category that you needed to work on today, you could easily drag it from your “Wedding” category to the top of your “Today” category.
If you work on a team, like we do, you can also send a task card to someone else’s board. So, for example, if Amy just finished a wedding and she’s ready for Jordan to email the gallery to the client, she can send the entire wedding card to Jordan’s board and put it on his “Today” category just by clicking “Move.”
Before she moves the card, she can also add a comment that Jordan will see when he opens the card. When he’s done, he can add his own comments, and send the card right back to her. This system has been SO helpful to streamline on-going communication and keep everything in one place.
We also love the ability to duplicate cards (just click “Copy” in the actions section) so that once we’ve created a task card for one wedding, all we need to do is copy the card and change the clients’ names.
Step 5: Create Checklists
This is perhaps one of the most helpful features of a card!
Checklists allow us to keep track of all of the actions needed for our multi-step tasks. “Sarah and Kyle’s Engagement Session” is technically only one task card, but within that task, there are quite a few steps. The checklist allows us to track the entire workflow from start to finish.
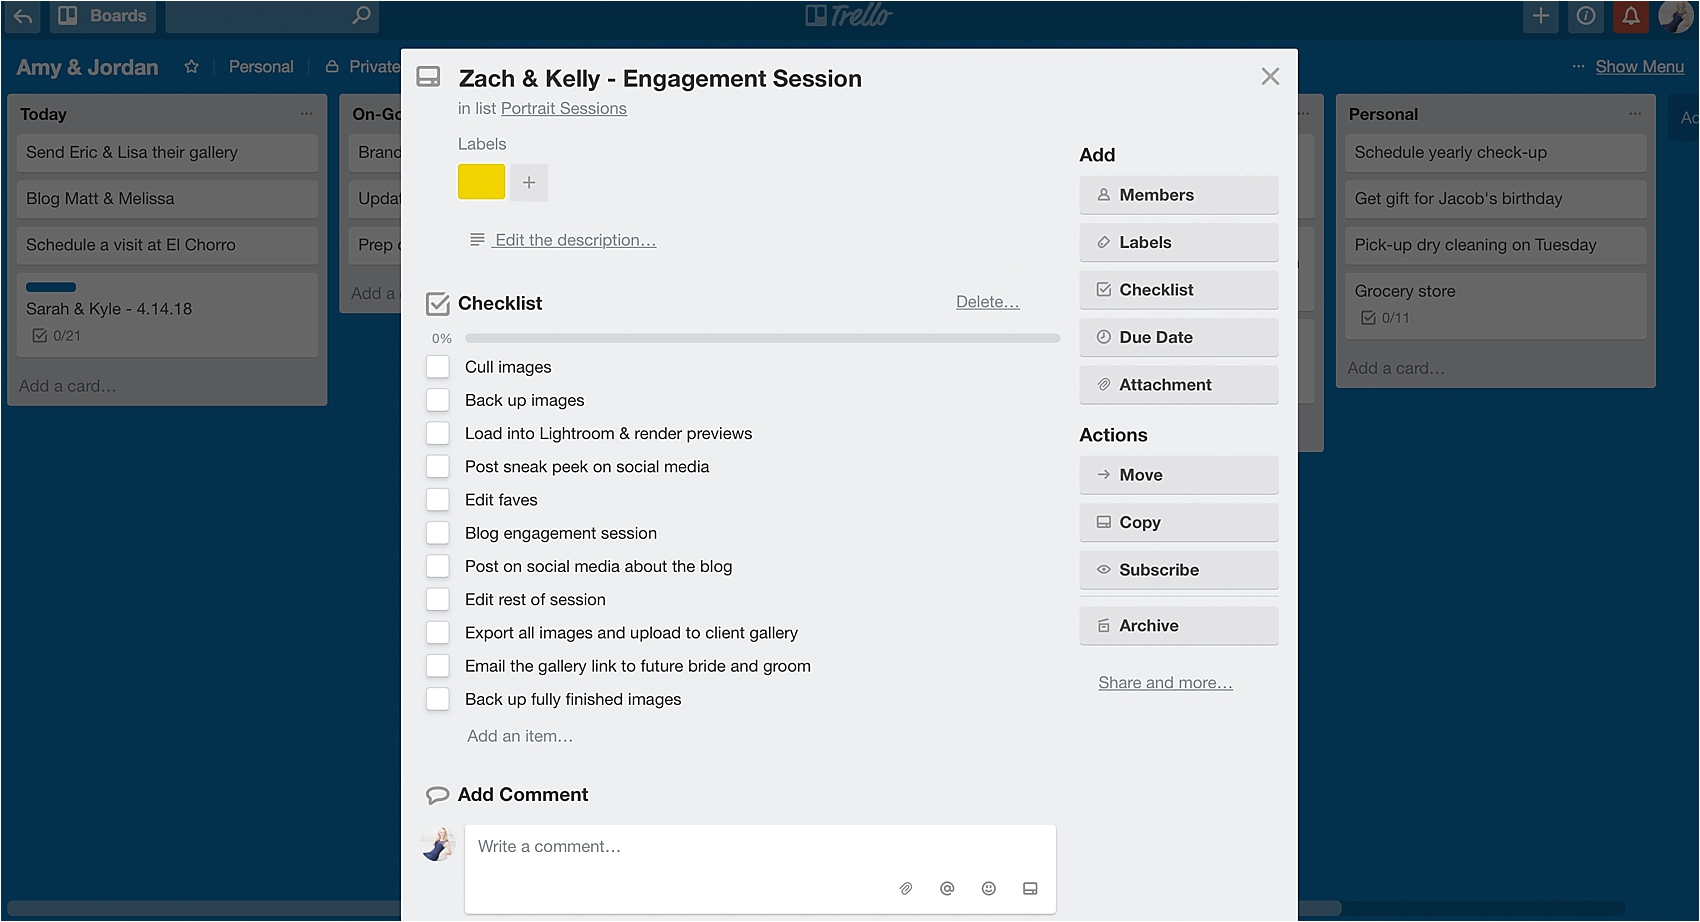
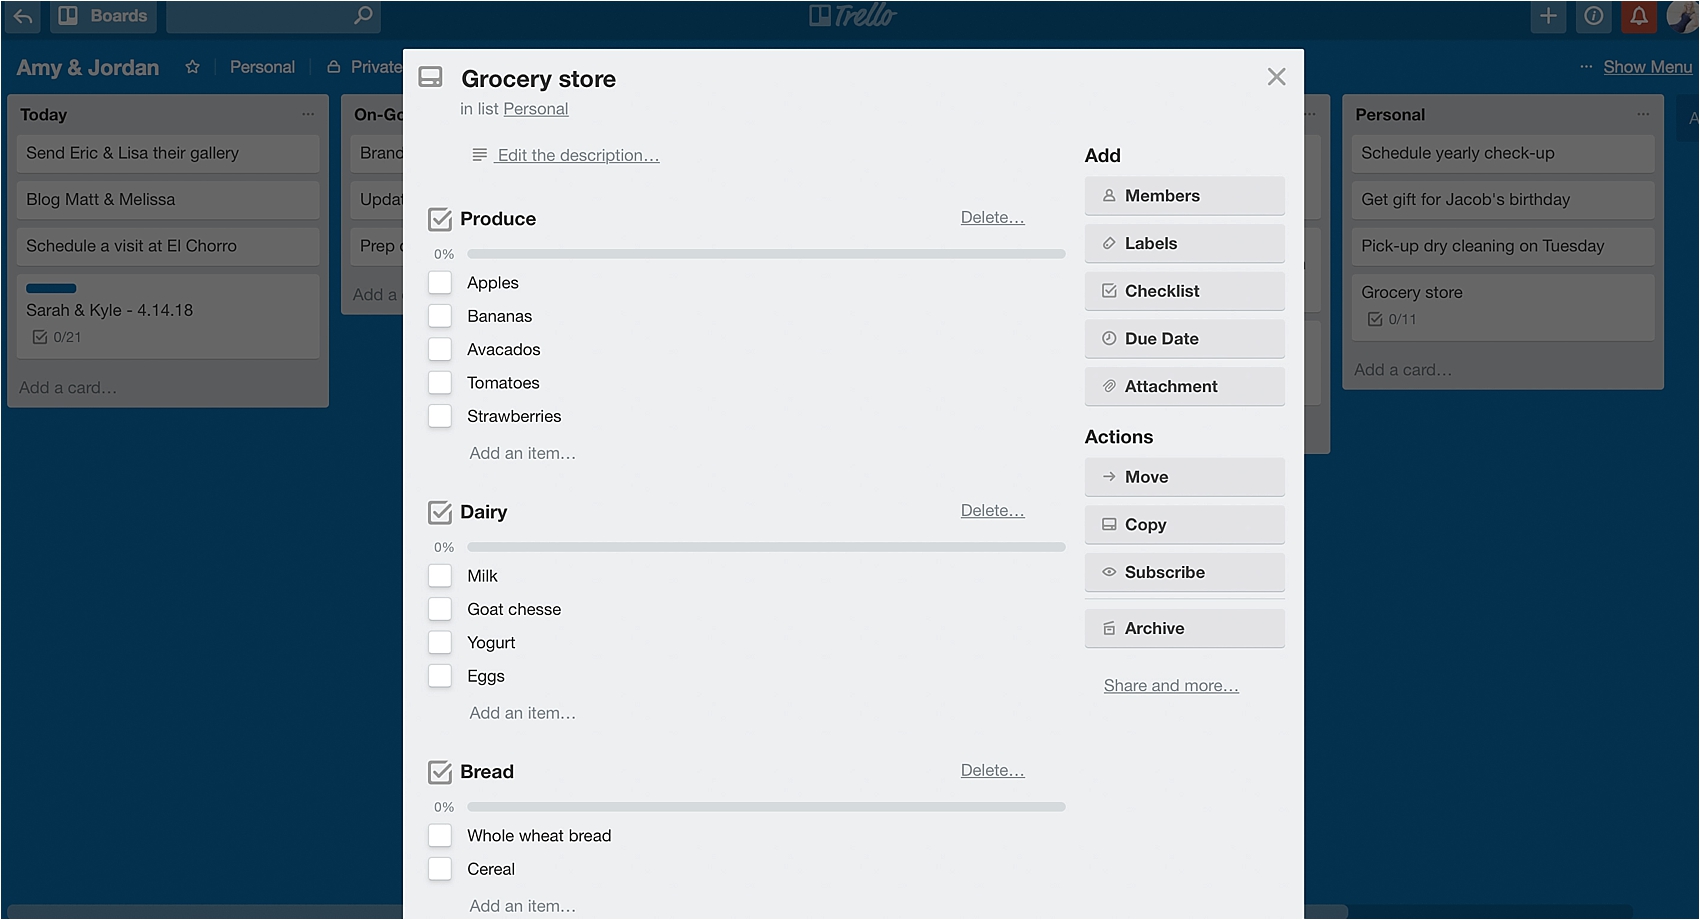
You could also use the checklist for things like the grocery store! We buy 80% of the same food week after week, so keeping a checklist organized in the same flow as the store makes it so easy to shop efficiently. And since Trello has a mobile app, we can add things to the list throughout the week on our desktop, but then easily pull it up on our phones when we get to the store.
Step 6: Utilize Labeling & Due Dates
We like color-coding our workflow cards (so all the blue ones are weddings, for example) because it just helps our brains see things more clearly. You can also assign yourself “Due Dates” for any tasks that are time sensitive.
And that’s it! Just like with any new tool, it took us a little while to get the hang of it and figure out what works best for us, but now we can’t imagine doing business without it!


